Bears at Mammoth Lakes

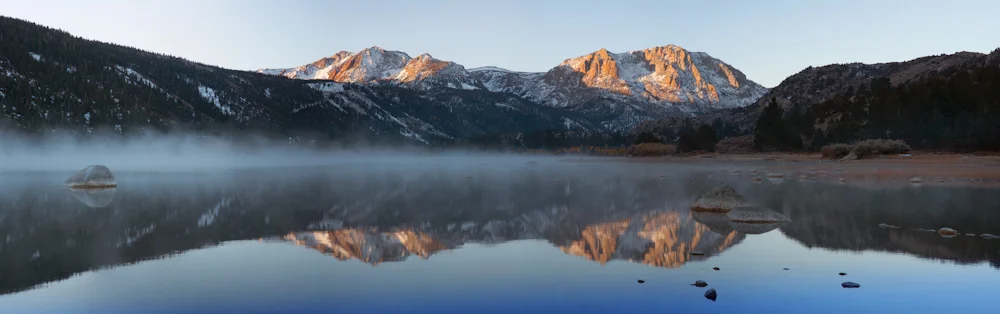
Last month, while I spent time photographing the landscape in Mammoth Lakes, California, I saw bears just about every evening. It's hard to see these massive animals and not want to point your longest lens toward them. 

This cub was born in February and is one of six (2013) cubs roming the Mammoth Lakes area.  Somehow in 2013 this little guy lost his mother and will be braving his first winter, alone. 

This cub was born in February and is one of six (2013) cubs roming the Mammoth Lakes area.  Somehow in 2013 this little guy lost his mother and will be braving his first winter, alone. 

The main challenge to photographing bears is light.  Most bears are only out after the sun goes down and back in their dens as the sun comes up.  The conditions for light on your dark subject (the bear) is normally very low.  However, today's cameras can allow you to shoot in very little light without strobes or too much image noise. 

Autumn photography can increase your odds of finding a bear in decent light in that they are much more active for longer hours.

I spoke to Mammoth Lakes Wildlife Specialist, Steve Searles, star of the Bear Whisperer television show (Animal Planet) about the Black Bear's habits during the fall season. 

"These bears are drinking about five gallons of water per day and feeding some twenty three hours per day."  Searles said. "They are also not urinating or defecating during this last few days before hibernation."

As the bears bulk up for hibernation they are out and around more and more during daylight hours.  This can be a nightmare for the Searles as he is responsible for bear management in Mammoth Lakes. He spends his days trying to limit the contact that humans have with bears.


Just before we arrived, a bear was taking a late night shopping trip into Von's to help himself to some apples and other fruit. 

Searles also told me that the bears are feeding on the small seeds that drop out of pine cones this time of year.  It no doubt takes quite a bit of foraging to fill up a hungry bear trying to stock up for the winter.  

D4D_9410-Edit.jpg

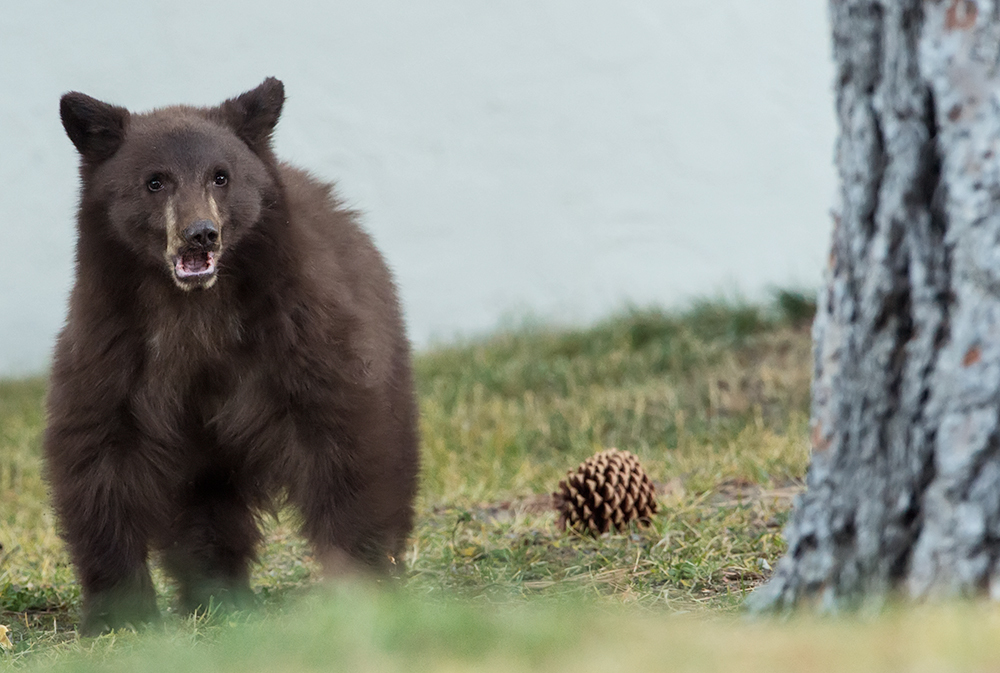
These are some great tips about photographing bears.  You now know their most common food source, pine nuts. You know they need water and they are busy extending their feeding habits to include some time even before the sun goes down. For me, I looked for several crushed pine cones and kept my eyes out late in the day.  I photographed most of these bears with a Nikon D4, 600mm mounted on a tripod and shot at 250th of a second at f/8 up to ISO 6400.

D4D_9373-Edit.jpg

American Dipper

AD_9313.jpg

In my travels photographing the Eastern Sierras, I decided to settle down on the edge of Mammoth Creek and sit with my telephoto lens to see what creature may happen by.

duck_9303.jpg

After a few minutes of waiting, I tracked a couple of Mallard ducks as they fed in the stream.  This is pretty simple photography work. Just hunker down in a warm dry spot and with a gimbal tripod head, that will allow you move your camera around to track whatever comes by. After watching the ducks for while, a couple of non-discript birds landed on the creek and started feeding as well.  So I called my long time friend, photographer and naturalist,  David Bozsik and he gave me the information on these birds. (When you are done reading this blog, click on his link and go check out his work.)


AD_9311.jpg

These birds are called the American Dipper (or the Water Ousel).  These clever little birds make their home in small creeks, streams and rivers.  They have highly water repellent feathers that allow them to submerge themselves by grabing on to the creek rocks on the bottom of the stream and work their way along feeding on invertebrates on the creek bed. 

Their nesting sites are built out of mosses and are typically found under waterfalls, which make the nest very hard to find for predators and photographers. 

Next time you are in an area where these birds are found, sit still and and maybe you can  watch these fascinating birds work the waterways.

Ameican-Dipper_9323.jpg

June Lake, California, October

June Lake, California.

June Lake, California.

I just got back from a week in the Eastern Sierras photographing mostly landscapes.  I thought I would relay a little tip for composing scenic photos, for your next excursion. 

Eastern Sierras at June Lake, October. 

Eastern Sierras at June Lake, October. 

In this shot you can see that I was using a wide angle lens and I incorporated some rocks in the foreground.  I always try to look for something to compose in the foreground so that those objects can lead the viewer into the frame.  While the mountains with the sunrise skimming across the top are the main focus of the image, the rocks add some texture to an otherwise mundane lake view. 

Composing the foreground with the reflections.

Composing the foreground with the reflections.

While I was setting up, and freezing because of not being prepared for 20 degree weather, I had a passer-by shoot the photo of me setting up.

Often when I'm setting up, other photographers will stop and ask me what I'm doing, what kind of lens or camera that I prefer.   This was do different, as a women walked by with a camera slung around her neck, asking questions.

After a few pleasantries, I asked her to take my photo with one of my other cameras.  She said, sure!  Almost flattered that I would ask.  

It took me a minute or two to take my long lens off my other camera and the woman watched me with great interest.  

When I handed her my camera and went to crouch down by my tripod, she became very curt, saying "Be quick about it!  I have things to do. Quickly now." 

What is that about?  She had all the time in the world when she was asking questions, but when it came to taking a quick shot for me, she became demanding.

This is a round about way for me to explain why the photo by me is slightly blurry, it wasn't shot by me.

Even in the panorama of the same scene, I chose to keep something in the foreground to provide some interest and to break up the reflections on the water. 


Even in this panorama, I try to include something like rocks to breakup the reflections and add some interest to the water. 

Even in this panorama, I try to include something like rocks to breakup the reflections and add some interest to the water. 

Panorama, June Lake

Panorama, June Lake

Moving Timelapse

Moving Timelapse

You know how to make a timelapse movie now, but how about one that moves? 

In order to get this to work, you have to have a system that can move your camera precisely after each exposure. You want it to take a shot, move the camera a fraction and take another shot. 

Timelapse Rail on location

Timelapse Rail on location

Typically this is done along a straight rail system, that has a motorized bed that transports the camera along at precise intervals. I use a kit from Dynamic Perception

Timelapse Shooting

Timelapse Shooting


Calculations are similar to regular timelapse but now you have to factor in how far the camera is going to move through the clip. 

Lets say your camera will move 5 feet.  So those 240 frames (figuring a 10 second clip) will need to be divided over five feet.  This will give you the distance that the camera needs to move after each exposure, over the time it takes to shoot 240 frames. 

One thing to keep in mind is if something is close to the camera lens, say, a pillar, a tree, or a wall, etc. you will need to move the camera in small increments. Otherwise the end film will be choppy. 

If the subject is farther away you can move the camera larger distances between shots. if you don't do this, you may not see that the camera is moving at all. Which would be a bunch of calculating for nothing.


Timelapse Part One

How are those done, those popular timelapse films?   If you have a DSLR camera you are half-way there.

Time-lapse is pretty simple if you let your camera do most of the work. In the menu system, of most of today's cameras, there is a feature that tells the camera to fire a shot every second or once every ten minutes or once every ten hours. You can set it for whatever you like. If not, you can buy an aftermarket product that is a timer that attaches  to your camera.

Next, you have to set your camera on a tripod.  This is very important keep your camera steady throughout the duration of the event.

Calculations: 

In order to get the time-lapse to look the way you want, you have to do a little math before you start.

Most films are shot at 24 frames per second. So in your calculation, you must allot 24 shots to make up one second of screen time.

First, you need to estimate the time of the event.  Be it sunset, a stadium being built or wedding event filling up, you have estimate how long this event will last.  Next you should determine how long the clip is going to be when it’s done. Once these are answered you can figure how OFTEN you will need to take a photo to make this a consistant, flowing film when it’s done. 

Lets take clouds going over a building. You have determined that the entire movement of clouds will take 40 minutes.  The final film should be 10 seconds long. That means you will need  240 images.  It also calculates that you need a shot every 10 seconds. If you are not into the math of this sort of thing, you can get an app for your iPhone called Timelapse Calculator made by CLamCam Video. I have the app and it works great.


TMLPSBB.jpg

Once you have all your calculations made, set your camera up on a sturdy tripod and set your timer inside your camera to shoot a shot once every 10 seconds for 240 frames.

Things to keep in mind while shooting timelapse are, keep your camera on all manual modes. No auto focus, no change in exposure, no auto white balance. That will make your clip as consistent as possible.

Also, make sure you have a fully charged battery. A timelaspe shoot may run for hours you don't want to run out of power. Turn off the automatic review option on your camera so that an image doesn't keep showing on your screen. This can waste precious battery life. You can always press the play button to review your work along the way.

Now you have all these images that look pretty much alike, what do you do with them?

I bring mine into Lightroom, rename them and export them as Jpegs (1920 pixels on the long side).  It’s very important to rename the files in sequential order. If you don’t you could be asking for trouble.  Most camera's file names reset every 10,000 images.  If you happen to be at that point where the filenames revert, your images will be out of order when you go build your video. So rename them.

Once all your images are renamed and are in separate a folder you will need to sequence them in to a movie.  I use QuickTime 7 on my Mac. There are many options out there for both PC and MAC.

It is an older version of QuickTime but it has just what you need; image sequencing.  Pull down File>Image Sequence>browse to where your folder of images are >choose the first image in the folder.  The program will ask you what film rate and you will pull down the list and click on 23.976 (24 frames pre second that will match the industry standard) Press enter.

Screenshot002.jpg

Seconds later your film will be ready to view. 

Now, how about those timelapse films where the camera is moving?  Here is a sample – next time I’ll show how that is done.


Copyright 2015, Terry VanderHeiden