
I just finished recording my book How to Make New Money When You Retire and putting up on audible. Check out this link and read about the experience.
Palace of Fine Arts, San Francisco

When you are out photographing, many times weather just doesn't cooperate. You have to be patient and I feel it is just best to wait.
When you have an iconic subject like the Palace of Fine Arts in San Francisco - you have most of the battle won by have just having a good subject. Here is where we started from:

Nikon 24mm to 70mm zoom lens. Shot at 24mm.
This evening I was out with four other photographers, which I highly recommend doing as its great to see everyone get to a site and then scatter, so each person gets their own unique view of the area. It can be a great learning experience see what others are seeing an trying to capture.
When we arrived about an hour before sundown the sky was showing overcast, low cloud cover. Not that uncommon of an occurrence in San Francisco. However, there is nice subject to work with, so I thought I'd try a few things.
I knew that later in the evening the lights would come on to illuminate the architecture so I had to be ready. The first thing to deal with is composition. Since it was still light out, the exposure would be dealt with later so I had about 45 minutes to explore some different views.
First things first, I had to decide on a lens. I had with me a zoom lens, Nikon 24-70 so I started with that. I was toying with different compositions to try and incorporate some foreground in the shot, other than just the lake.
I noticed one or two blooming lilies that were a bright yellow and I thought that might make a good foreground. In order to make the composition work, I switched to my Nikon 14mm and started to position my tripod so the flower could be no less than 18 inches away.
Next, I had to deal with Depth of Field. I could have shot the image at f/22 and likely would have been able to get the entire scene in focus but that would cause some diffraction in the final image.. When images are shot at f/22, because of the tiny hole that light has to pass through, that setting can cause the image to not be as sharp as I'd like.
Inspired by a good friend of mine, photographer, David Bozsik, who has been Focus Stacking (taking several images at different focus plains and assembling them later) for quite some time, I thought I'd give that try.
As the light was getting low, I didn't want to run my ISO up very high in an effort keep the image as sharp as possible. I ended up shooting at F/5 the sharpest point of this lens. While I shot several images, I only need to stack two of them to get the foreground sharp and the background sharp.
If you remember, I was shooting on a tripod at a very slow shutter speed so I knew the water would be softly blurred. So the only two shots I really needed were the shot of the foreground and the shot of the structure across the lake. While I could have assembled them in Photoshop I instead opted for Helicon Focus software to combine the foreground with the background image.
The slow shutter speed blurred not only the water but the sky as well giving it an interesting mottled look.
The other bonus of working with only two images, I was able to change the exposure for the flower (lighter) and have a different exposure for the Palace area.
The timing of shot like this happens very fast as the light is changing rapidly. You have to wait for the balance of light from the sky and surroundings to match the intensity of the artificial lights on the buildings. Shot too early the artificial lights would be not making an impact, shot too late and sky would be black and nothing interesting.

Before and After

As a professional photographer, techniques and digital processes change rapidly. Sometimes its difficult to keep up with all the changes from lighting to post processing of images. One thing that doesn't seem to change that often is the people. People are fundamentally the same, in that they want to look their best and they want there product to be shown off in its best light.
For example I photographed this model, Melissa Tingley back when she was about 12 years old. She grew up and got into modeling and I photographed her many times. After appearing in magazines such as Playboy and numerous calendars, I photographed her for an advertisement for San Francisco Cigar Company.
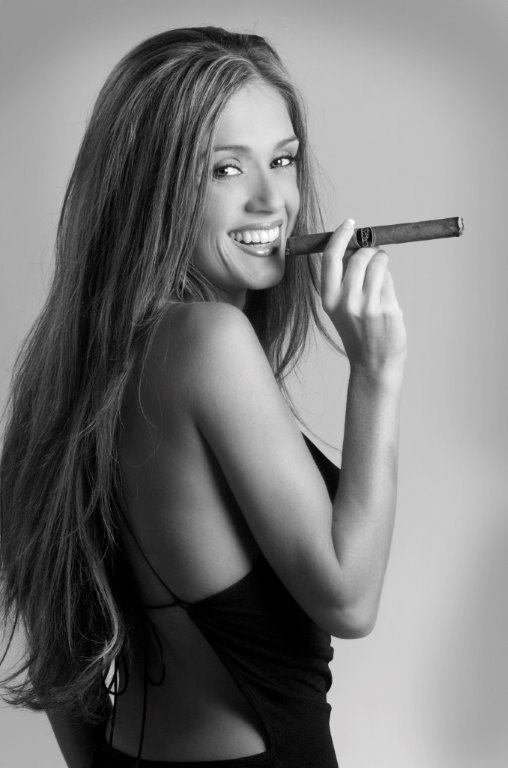
This shot was taken in the studio with one large 4-foot soft box on the subject and one small defused light on the background. Pretty simple lighting. The idea is to keep the main light as close to the subject as possible to yield a broad, soft flattering light. The closer the better for creating a softer light.
Fast forward to last month where I photographed Melissa yet again. Like the last time the advertisement was for the San Francisco Cigar Company. They have a new store in Martinez California and wanted to use some images for promotion. The owner, tracked down Melissa and we were reunited as photographer and model once again.
This time was a little different as we were shooting on location inside the store.

Luckily, it was before the store was open so we didn't have to work around customers but the store offered some challenging lighting puzzles to figure out. First, the store was primarily dark. Dark, rich woods for the floors and fixtures and dark leather for the sitting areas. The lighting on the walls was any photographer's favorite, spot lighting on light colored walls. Once we understood the color balance for the background, using my new best friend the color meter, we were able to alter what the camera saw in terms of color balance and we could alter the lights with gelatin filters to balance everything.
The lighting I used was Profoto B1 portable strobes that I think are fantastic. They are easy to dial in the exact amount of light you need and the light modifier choices are almost endless. For this shot I used one head mounted in a large 5-foot Octigon soft box for that large soft light that makes skin look great. I also used another B1 in a 4-foot strip light soft box to create a little separation between Melissa and the rest of the store. Lastly I used a B1 head with no reflector or soft box (bare head) to kick some light into the rest of the store.

In the final shot, we used the same lights as before but because of the Profoto versatility we could turn the lights way down and shoot at a wide aperture to create a shallow depth of field. This would bring less attention to the items on the bar, (Cigar, dice and wine glass) and background and more focus to the model.
I am looking forward to photographing Melissa again but hopefully sooner than 12 years.
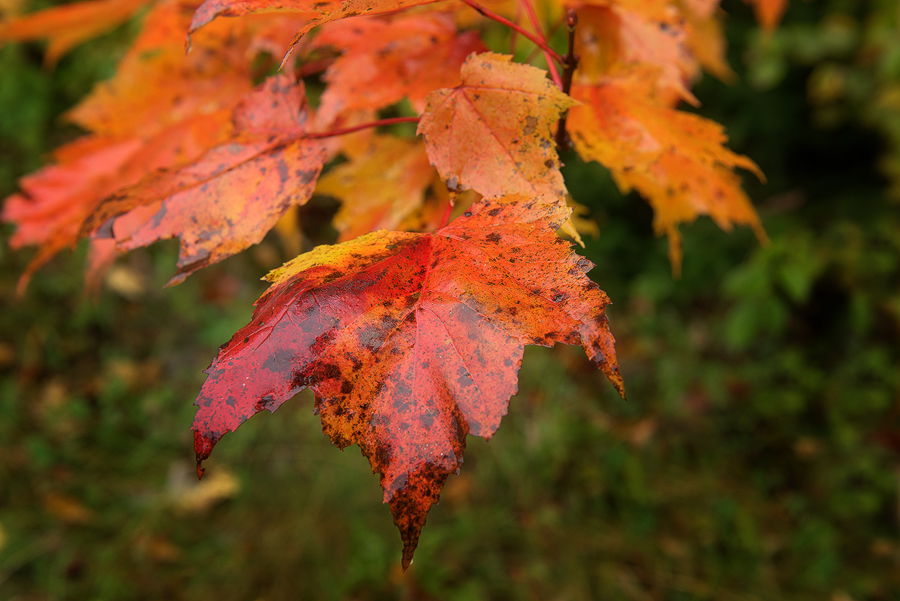
How to Photograph Fall Colors

Lake Winnipesaukee, New Hampshire
Once you have found yourself in and amongst the fall colors, whether it be northern Maine or the eastern Sierras of California, you need to know how to capture the beauty and color of the fall season. Most of the great locations for fall colors don't give you but a week or two of peak color so you have to act fast.
The first thing to consider (almost always the first thing) is the light. What kind of light are you working with? The tried and true times of the day to best make photographs still apply; sunshine in early morning and late in the afternoon are usually the best conditions. However, don't put the camera away if you find you have overcast, gray skies. This soft light can bring out the colors quite well without having to deal with the extreme contrast of a sunny day.
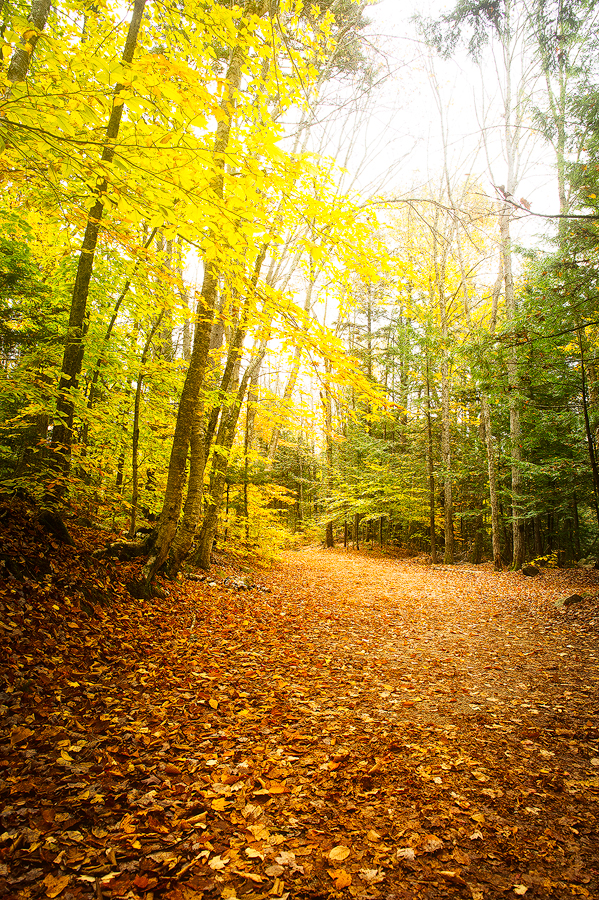
Look for contrast in color and in texture of the image. The fallen leaves make a great lead-in to blanketed trails and waterfalls. The lower light of an overcast day, coupled with the shade of a forest may enable you to shoot slow shutter speeds without the use of a Neutral Density Filter. With your aperture being set with a tiny opening and a very low ISO, you might get the shutter speed down to an 1/8th of a second which should be slow enough to get soft blurry water falls. Do remember to bring a tripod or figure some way to stabilize your camera. Maybe using a sandbag or some extra clothing to create a support. Also remember to bring some sort of camera trigger. I would suggest a cable release but if you don't have one, try using the self timer to fire the camera without it being moved.
If you don't have a big budget for camera equipment I would still encourage you to put a Circular Polarizer filter at the top of the list. Not only will it knock down reflections from rocks and allow you to see into rivers and streams, it will give more depth to the color of the leaves. Also, most Circular Polarizer filters will cut the light by about a stop and half. That could be just enough light reduction if you are trying to get a slow shutter speed for shooting waterfalls.


While most people are on the look-out for the reds, oranges and yellow colors in the leaves, don't forget the cool colors. The accent of green pine trees and the blue of a lake will make the warm colors pop off the page.

Shot with a Nikon 600 f/4 lens for better compression of the lake.
Keep an eye out for reflected color. Using a longer lens can compress the color in the image to make a beautiful background shot. Since you are likely shooting digital, give yourself options. Shoot one of just the reflection, then go ahead and include the actual trees in the composition and shoot both vertical and horizontal. That way, you will have lots to select from when it comes to the editing process.

If you are shooting with a tripod, make sure you utilize your range of aperture to get images with full depth-of-field as well as some with shallow depth-of-field. Lead the viewer through your images with your composition. Have them linger on what you want them to look at by using depth-of-field or lack there of, to your advantage.
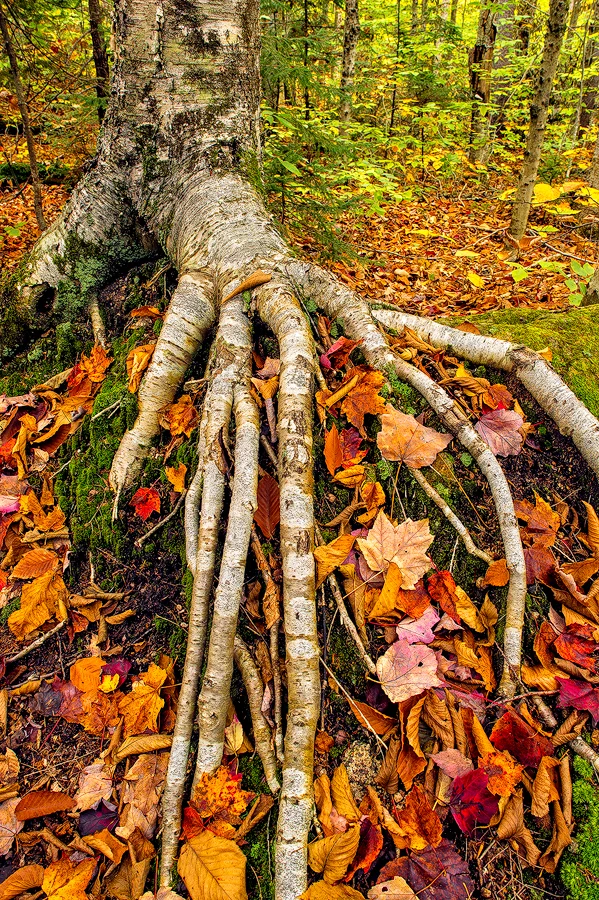
This image caught my eye as it kind of looked like a creepy hand stretching into the leaves.
Be sure to look around, both up in the sky and down on the ground. You might find a tree with a root structure that is interesting or a blue sky that contrasts well with the autumn colors.
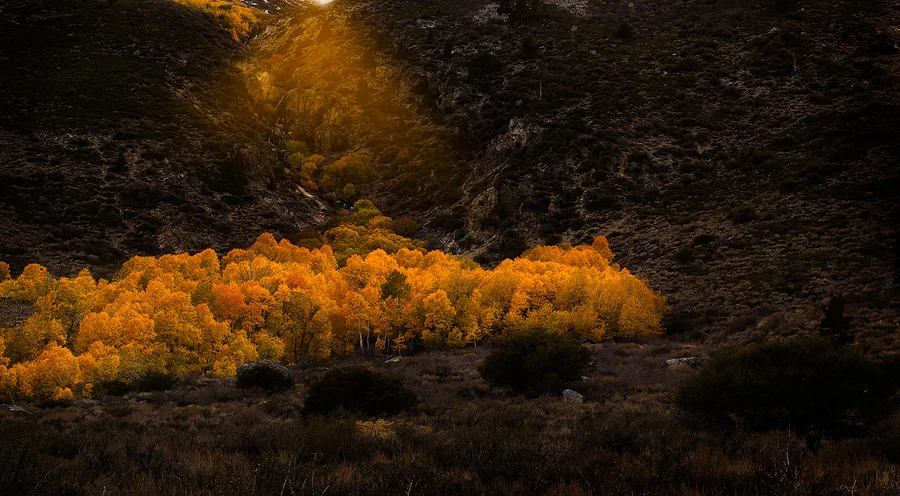
For your camera settings, put your white balance on "clouds". This will yield a warmer set of tones that will help enhance the fall colors. Avoid using the "A" mode for white balance as the camera will see large sections of yellows and reds and try to compensate by cooling the image down (adding blue and cyan).
The most important part is to keep shooting. Shoot from before the sun rises and until at least an hour after it sets. If the sunlight makes the scene too contrasty, head under the canopy of leaves and shoot in the forest. If the light still doesn't cooperate, spend those brightly lit times of day searching for where you want to be at sunset and sunrise.
Capturing the colors of the short fall season is challenge but it can be most rewarding with hues that can only be seen in certain locals and during a season that just doesn't last very long.
How to Find the Best Fall Colors in New England
Knowing when to go to New England to see a vibrant show of colors in the fall will have you planning your vacation months in advance. Understanding how to forecast your getaway to the North East to see the peak of color is very important to the planning process.

The leaves will start changing in late September and early October. What needs to happen in a best-case scenario, is a warm summer followed with a sudden, dry, cool down in the fall. Nights should be in the 30 to 40 degree range while the days can reach 60 or 70 without having an effect on the color. It’s the cold at night that brings on the color. For this reason, waking up in the morning can be like Christmas day, eager to see what new color as emerged.
Storms that make their way into the North East can be devastating if they happen to arrive at the wrong time. Some leaf-peeping seasons can be cut short by wind and rain that removes the color leaves prematurely. However if you are patient, you maybe able to drive to where the storm doesn't effect the color burst of the leaves.
Cold Nights
Keeping that in mind, it’s generally colder in the north than in the south. The fall colors will gradually sweep down from the mountains and work their way to the flat lands as the season progresses. Trees are more apt to change from green to color when they are more exposed to the cold night air. For example, trees along a river or lake will change faster that inland trees that might be protected from the cold.

As a good guideline, start your trip in northern Maine. October 1st. While Bar Harbor and the Acacia National Park are great places to visit, you will have better color as you go inland away from the coast in early October. Up in the area of Baxter State Park is a good place to start or head over to the White Mountains in New Hampshire or head over to the Green Mountains in Vermont. These higher elevations will yield more color early in October.

Along the Kancamangus Highway, out side of Conway New Hampshire
Around the second week of October a fantastic drive is in New Hampshire along the Kancamagus Highway. This 34 mile stretch of road follows the Saco River with several turnouts along the way for photographs of covered bridges and tumbling water and rocks. Drive to North Conway, New Hampshire, do some shopping and then drive a mile south to pick up the Kancamagus Highway heading east. Allow a few hours or as much as a full day to enjoy this scenic drive.
As the month of October progresses so does the color down into Southern Vermont, up-state New York, southern Maine and New Hampshire, working its way down to Massachusetts, Connecticut and beyond. So let the time of year be your guide. If you have the time to spend in New England from late September all the way through October you will surely have some great opportunity to see the fall colors at their peak. If you only have a one or two week window, then be ready to drive a little north or little south to see the best colors.