Photoshop

Creating A Professional LinkedIn Portrait

Many people these days are planning to get a new job or advance their career. From a social networking standpoint, LinkedIn is the cornerstone of networking for a new career or career advancement. With over a 175 million members, it's a fantastic online destination to brand yourself. When you are considering how to brand yourself - the first thing that comes to mind, as well as the first thing that people see, is your profile photograph. It has to look professional.

Ted Prodromou of the Entrepreneur suggests, "Post a professional photo". "First impressions are very important and people will judge you within a few seconds when they see your LinkedIn profile."

From the viewer's standpoint, your first impression is your profile photograph.  Here is a before and after example:

Robert's actual profile image was shot with the parking lot as a background.  We scheduled a professional portrait session, where we brought the focus back to the face and not to the glare in the background.

First we used a long lens to create a shallow depth of field to isolate him from the walls of his family room in his home. Using a combination of available light and flash fill light, we created several images.  We had Robert change his shirt a few times to experiment with colors and to give us some variety in the choices.  As well, we changed expressions, and the position of the upper body.  The session took about 40 minutes.

Once his favorite image was selected from an online image gallery, we opened the original image and started the enhancement process.

Image enhancements can be anything from removing blemishes to brighting the eyes.  I often reduce wrinkles and soften skin as well when I am retouching a head shot. The key is to not over do the enhancements. You must leave some remnants of wrinkles or the face can start to become too flat looking.  However, this level of retouching is in the eye of the beholder and I try to complete whatever level the client would like.

Alyson Shontell of the Business Insider wrote. "Studies have shown that profiles with pictures are much more likely to get clicked on LinkedIn than those without."

While the overriding thought is that any picture is better than "no picture", when planing to create or update your LinkedIn profile, strongly consider going to a professional photographer that knows how to pose, how to use the light, and how to retouch an image without making it look obvious.

Here is another example:

Heather used her own cell phone, at arm's length to create this profile photograph.  While this is a nice photo and could very well be used on Facebook, it's not appropriate for the likes of LinkedIn.

In this portrait, we didn't have any available light that was usable, so we lit the subject and the background entirely by strobes. A slight warming gel was used on the hair to give it a little more warmth and to separate her dark hair from the background. While this image looks casual and comfortable it takes more time than you might think to create the right image that portrays that individual in a professional manner.

William Arruda of The Ladders writes, "When I refer to your headshot, I am talking about a professionally taken photo that reflects your personal brand — not a picture your mother took of you at last year’s family picnic! "

Here is yet another example of an active professional on the LinkedIn network that was using a substandard profile photograph:

Michael is not in real estate, nor is he in satellite TV sales. There is no reason he should have homes or a satellite dish distracting the background of his professional profile photograph. He's a salesman, one that travels nationally for his clients. Even though at this time, LinkedIn does not feature huge photographs, you don't want to show one that is pixelated in any way.

In the portrait we just created, Michael is a professional. He is wearing the type of clothing that is expected in his line of work.  The eyes are bright and the face is not distracted by any background elements. In fact, the background subliminally speaks to the viewer that he travels and he would travel for them. He is friendly, but not overly so.  This portrait communicates a professional image.

This session took about 45 minutes. We explored different backgrounds in the home, while still keeping the lighting to bring out the face as the main feature.

Vivian Giang, Business Insiders wrote: "In a study conducted by TheLadders, an eye tracking heatmap shows that recruiters spend 19 percent of the total time they spend on your profile looking at your picture. Then, your current  job position and education are glanced at, but not so much time is spent on your skills, specialties or older work experiences."

If so much time is spent by the viewer on your profile photograph - then make it a professional portrait. After all, LinkedIn is a professional network.



Building Stock Photography

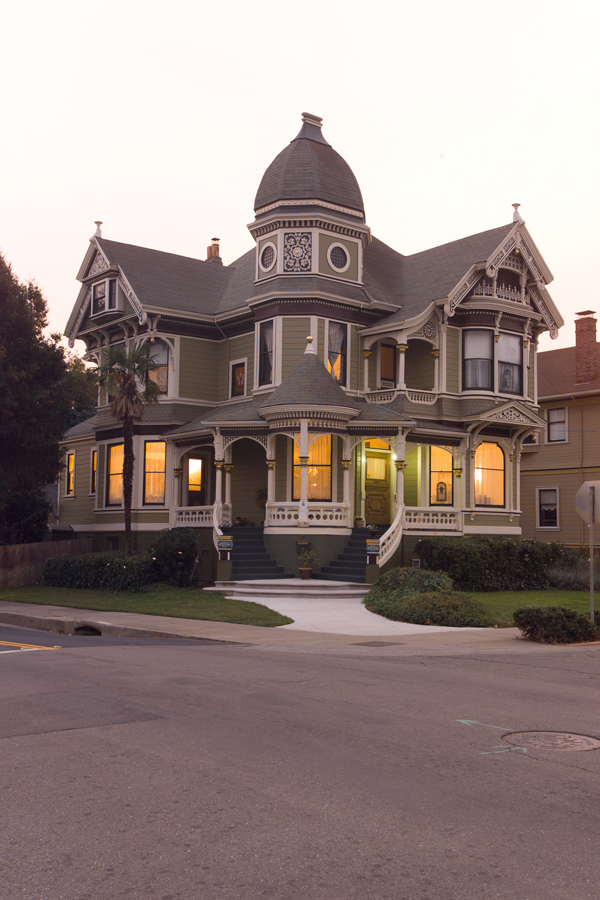
Stock photography is fantastic way to be reminded about past images. I was asked to photograph a victorian home for Alameda Magazine back in 2004.  I scouted the location and then returned at the best time of day to get the image I wanted.  I was disappointed that the owners were not home at the time, since there were some things that wanted to take some liberties with, for the image.  For example, they had some political signs in the front yard that needed removing, along with a few other things I wanted to change.  I returned a few days later after making an appointment with the owners about taking the photograph of their home.  We took down the signs, and I had them turn on all the lights in the house. Unfortunately, not every room in the old home had lights to turn on!  Undaunted, I shot a series of images as sun dropped in the sky and figured I could fix a few things in Photoshop later.

The first thing I realized was the sky wasn't very nice. Pure white is not all that compelling. Thankfully, I shot some sky photographs near this home a day or two earlier so I grabbed those out of archive. Next I had to do some tonal changes to the front of the house. After some change of levels, burning and dodging, and color correction I started to see the image I was looking for.

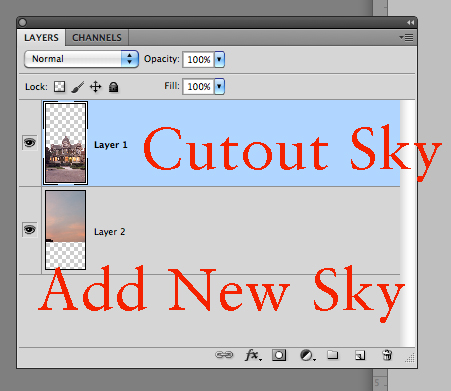
I selected out the top edge of the home and dropped it out so I could place in any sky I wanted at that point.  I tried to find an evening sky that looked compatible.

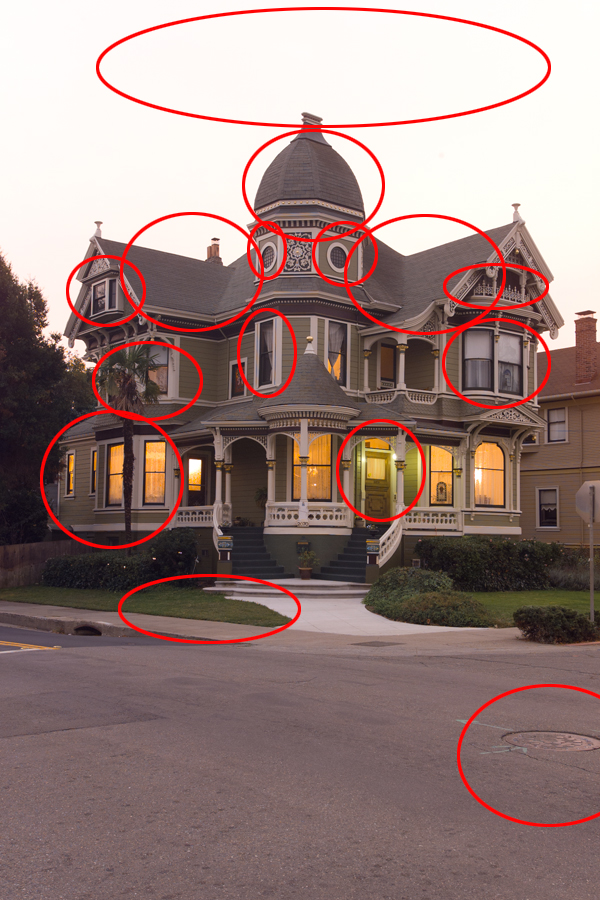
 Lastly, I had to go into the image and fix the details.  Some of the changes are marked above.  Taking out the man-hole cover, fixing the shaggy lawn, turning on lights in rooms that did not even have lights. Color correcting the front porch light. Darkening the street, softening  the side buildings to bring focus to the Victorian.  Fun stuff.

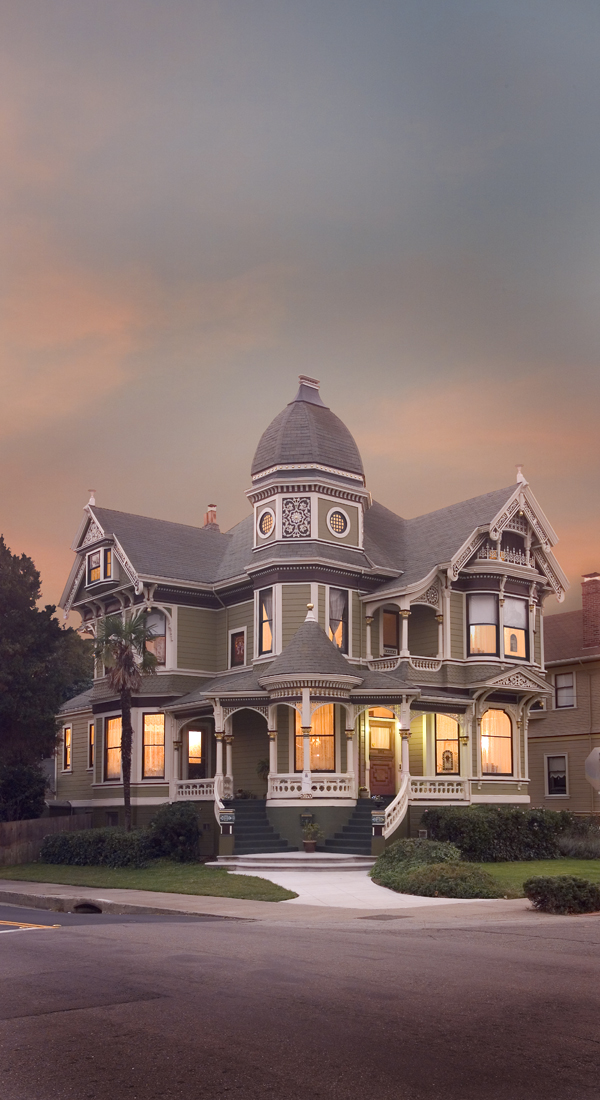
 Extra sky was added to give room for the magazine to print the magazine title and other information.  The great thing about this image is that has been sold several times.  Just last week, some eight years after it ran the first time, The Alameda Civic Ballet will be using it in one of their campaigns. Stock photography, the gift that keeps on giving.

Panoramic Portraits

If you photograph family portraits, it is always a good practice to try and create an image that is a little different.   I had the pleasure of photographing the Lucas family, which included Mom, Dad, five daughters, one son and their two dogs. So with this large family we created an image that is not your normal family portrait. To get the image I had in mind, I took out my panoramic gear, had the family sit as still as possible and started to work.

With the 85mm in place, I shot several vertical images going from left to right with a generous overlap to each image.  Then I did the shot again, this time, going from right to left.  For good measure, I shot one more set, left to right. All of these images amounted to about 30 shots total. This Panoramic Rig from Really Right Stuff, allows me to keep the center of the lens perfectly aligned over the exact center of the tripod.  So when the panoramic images are created, they are perfectly aligned with each other.

The next step was to load all these images into Lightroom 4 and figure out which was the best series of 10 images images.

Once the best series of ten images was figured out, I stitched them together using Photoshop.

In Lightroom 4, you select all the images you want to build your panorama with and then right click.  Go to Edit in>Merge to Panorama in Photoshop. This will open up Photoshop and then start placing images on thier own layers and creating layer masks for each one.

You can probably see from the image above where there were a couple of  problems.  It was not with the people, but with the dogs.  They didn't sit entirely still. So even in a quickly shot series of images the dogs were in different positions with each photograph. I figured this might be the case when I was shooting, that is why I shot so many extra photographs.

In one shot, the dog is laying down and in the next shot that was suppose to be blended with it, the dog is sitting up.  Photoshop doesn't know anything about the subject so it does the best job possible lining up the images.

To solve this problem, I had to go back to the original images, where the dogs looked best and then cut them in separately.  By selecting each dog, I was able to pull them out of one photo and then place them into the main combo shot.  I had to consider shadows, sleeves, hands that might be covered up, etc. to make the shot look believable.

Finally the main photograph was done, built out of ten portions of a series of images.  This extra work created a very large file that gave me the ability to print it large and still maintain sharpness and quality.

Final image with people and dogs all in place.

Photographing Yosemite

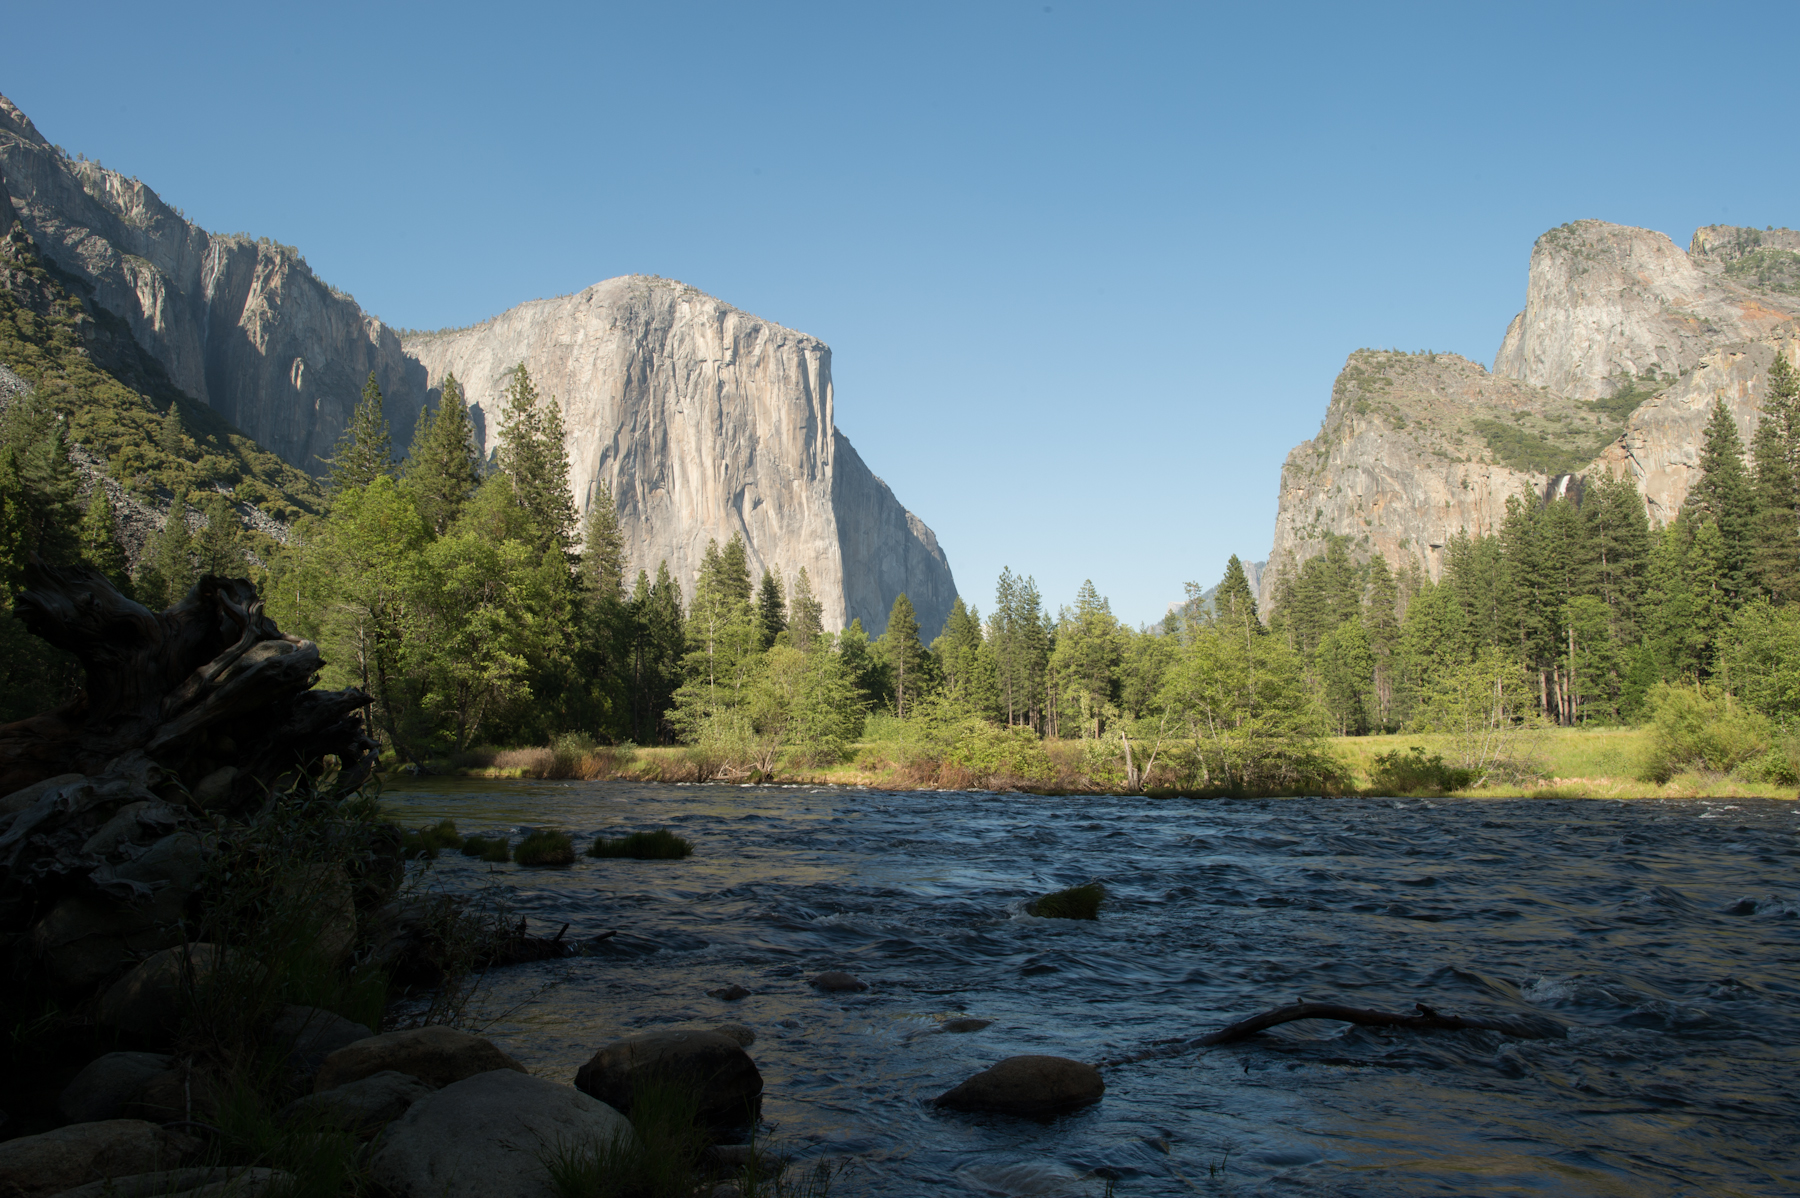
Yosemite is a fantastic place to visit but it can be quite difficult to get the shot that you want because of the conditions.  I found this scene near the exit of the valley floor. As you are exiting the park, its on the left side,  pull over there is plenty of parking.  The Merced river runs right by you with El Capitan in the in the background.  This is not a secret spot, in fact, I have seen it many times in photographs.  During the three hours we were at this location waiting for the best light, at least 200 people stopped to get this same shot.


The conditions that Yosemite throws at you can be difficult to deal with. First off, is dealing with the people.  If you want to shoot pure landscapes, then you aren't likely to want people in the shot.  Most people understand and will move out of the way, some people, however, are so self absorbed they have little regard for others around them.


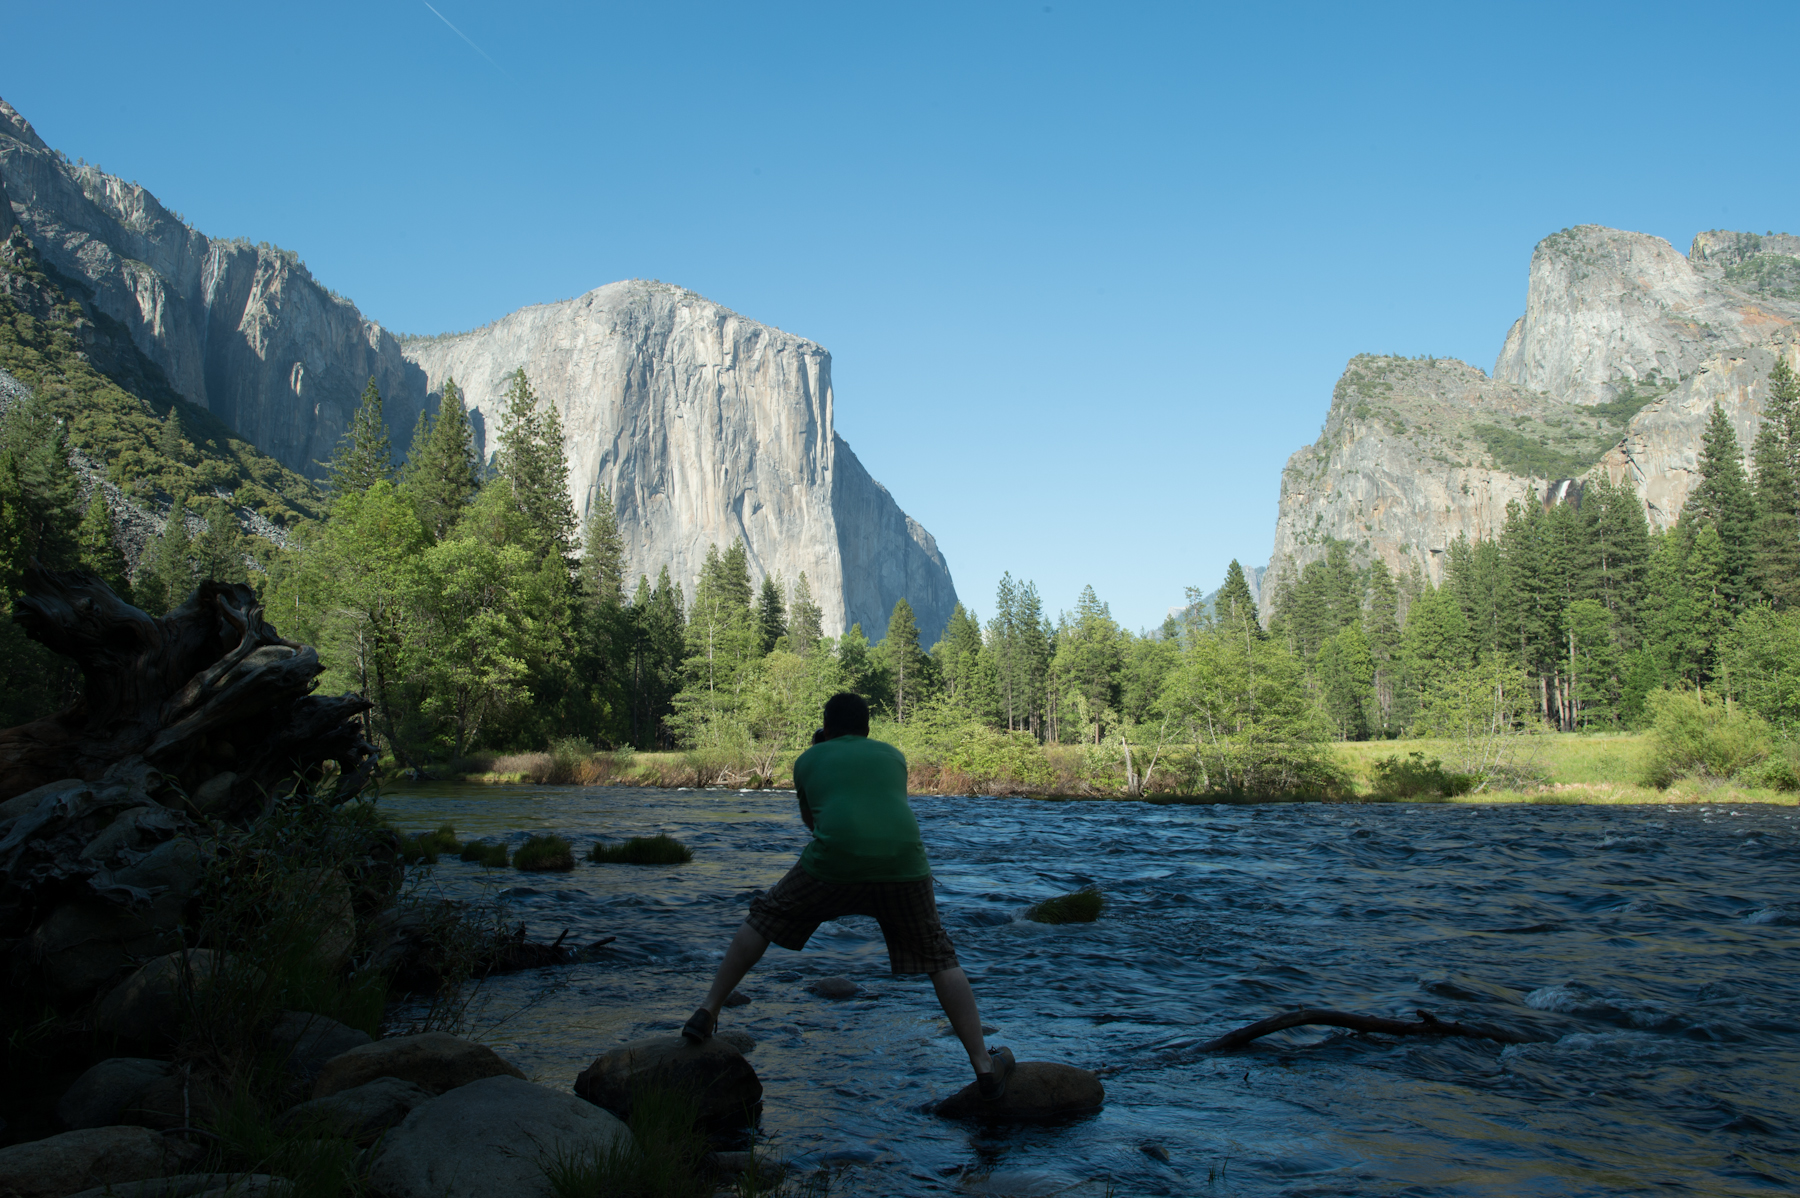
Photographers like this can make shooting Yosemite difficult.


I had been in position for about a half hour, waiting for the best light of the day, when this photographer decided to jump in the middle of my scene and get his shot. This guy walks up, looks at me with my tripod in the water and just walks in front of me to get his "amazing" shot. I knew that he would be gone as quickly as he arrived, so I didn't sweat it.

There are a couple of things you can glean from this photograph to determine as to why his picture wont be all that special.  First off, he will have to be shooting very fast to hold that pose, thereby having the water in his image, not soft but hard looking.  It looks like he will not have anything in the foreground except the water so that is not likely to be very interesting. Also, because of the contrast of Yosemite, his foreground will be too dark or the section of El Captain will be too light.  Since he is hand holding the shot, it's not likely he will be able to create a merge photograph like I will show you in the next section.

****************************************************

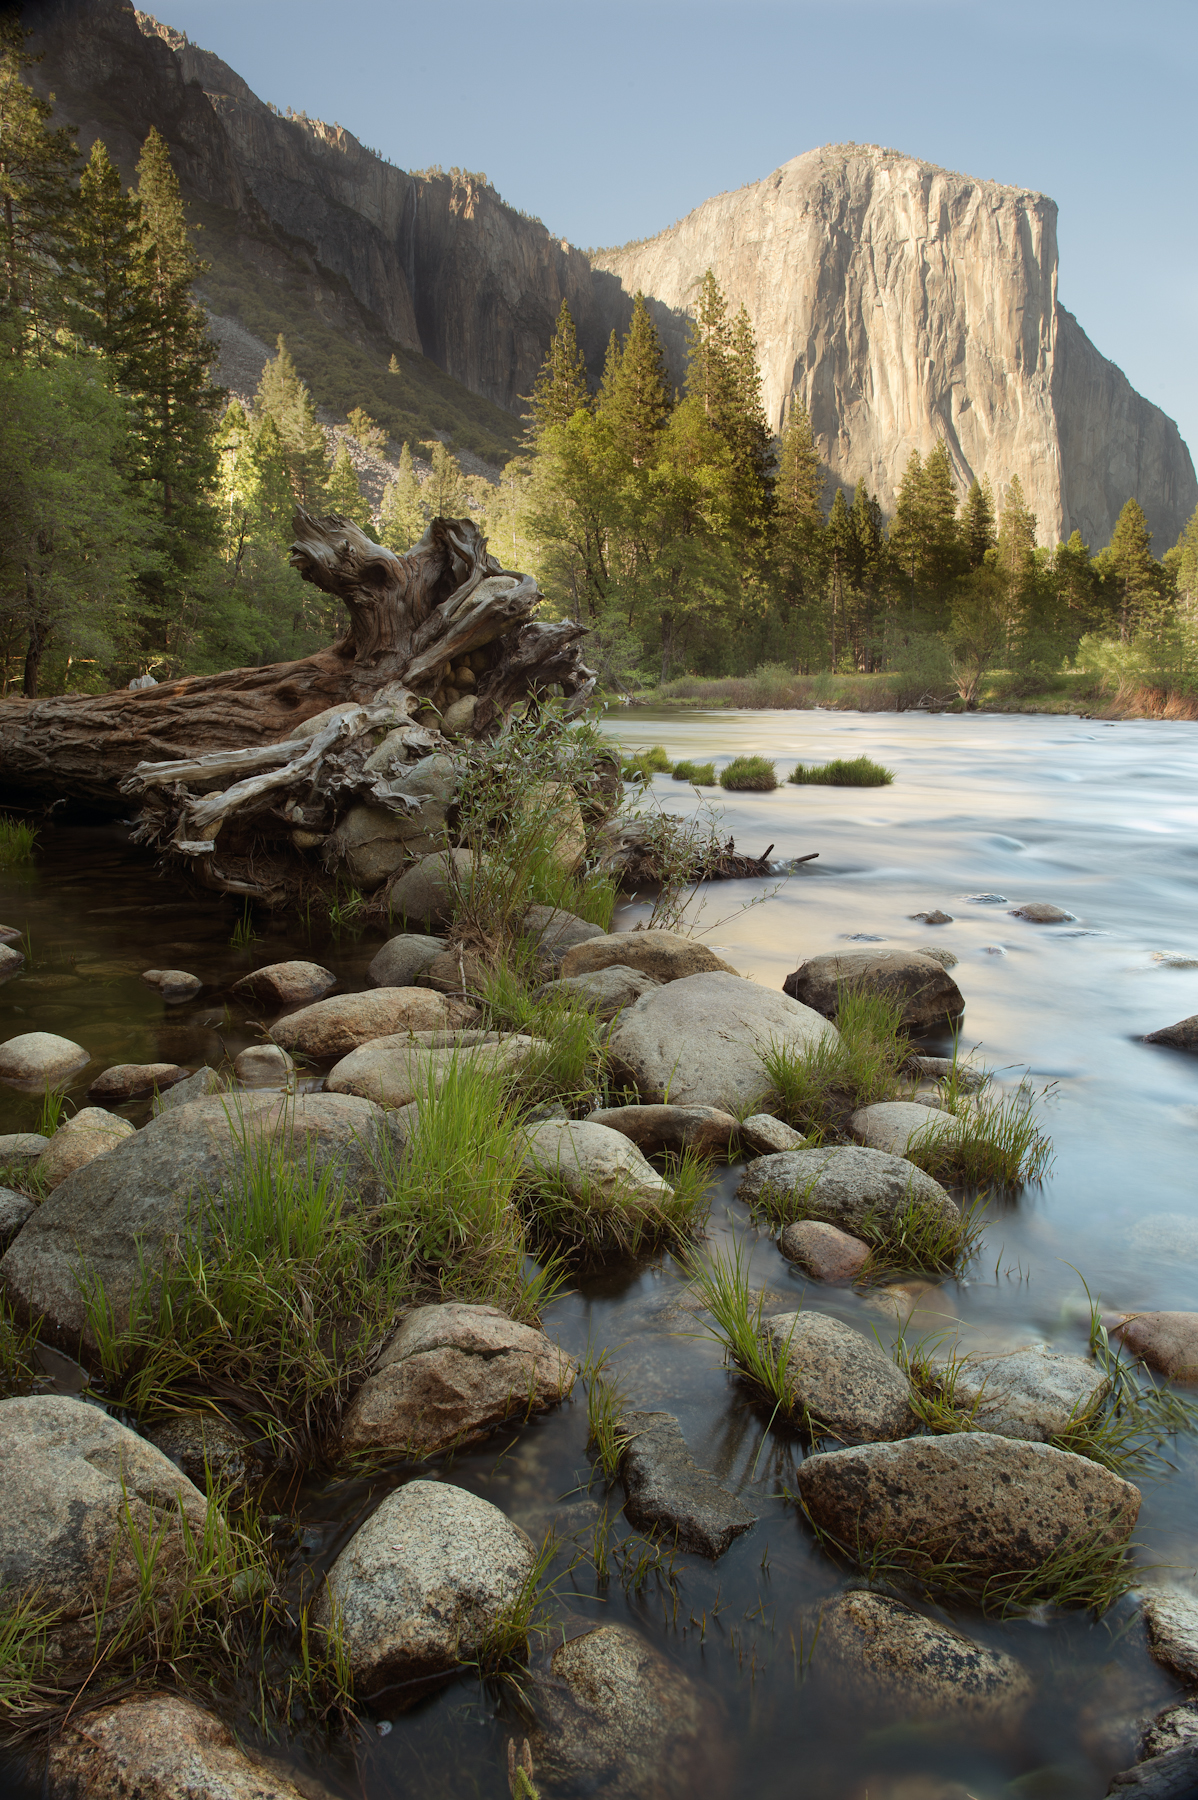
After being at this spot for a while, I started looking around at my foreground.  I liked a downed tree off to me left and I also liked the rocks that were right in front of me.  I put on my 24mm lens and decided to make a vertical photograph.  Here is what I started with:


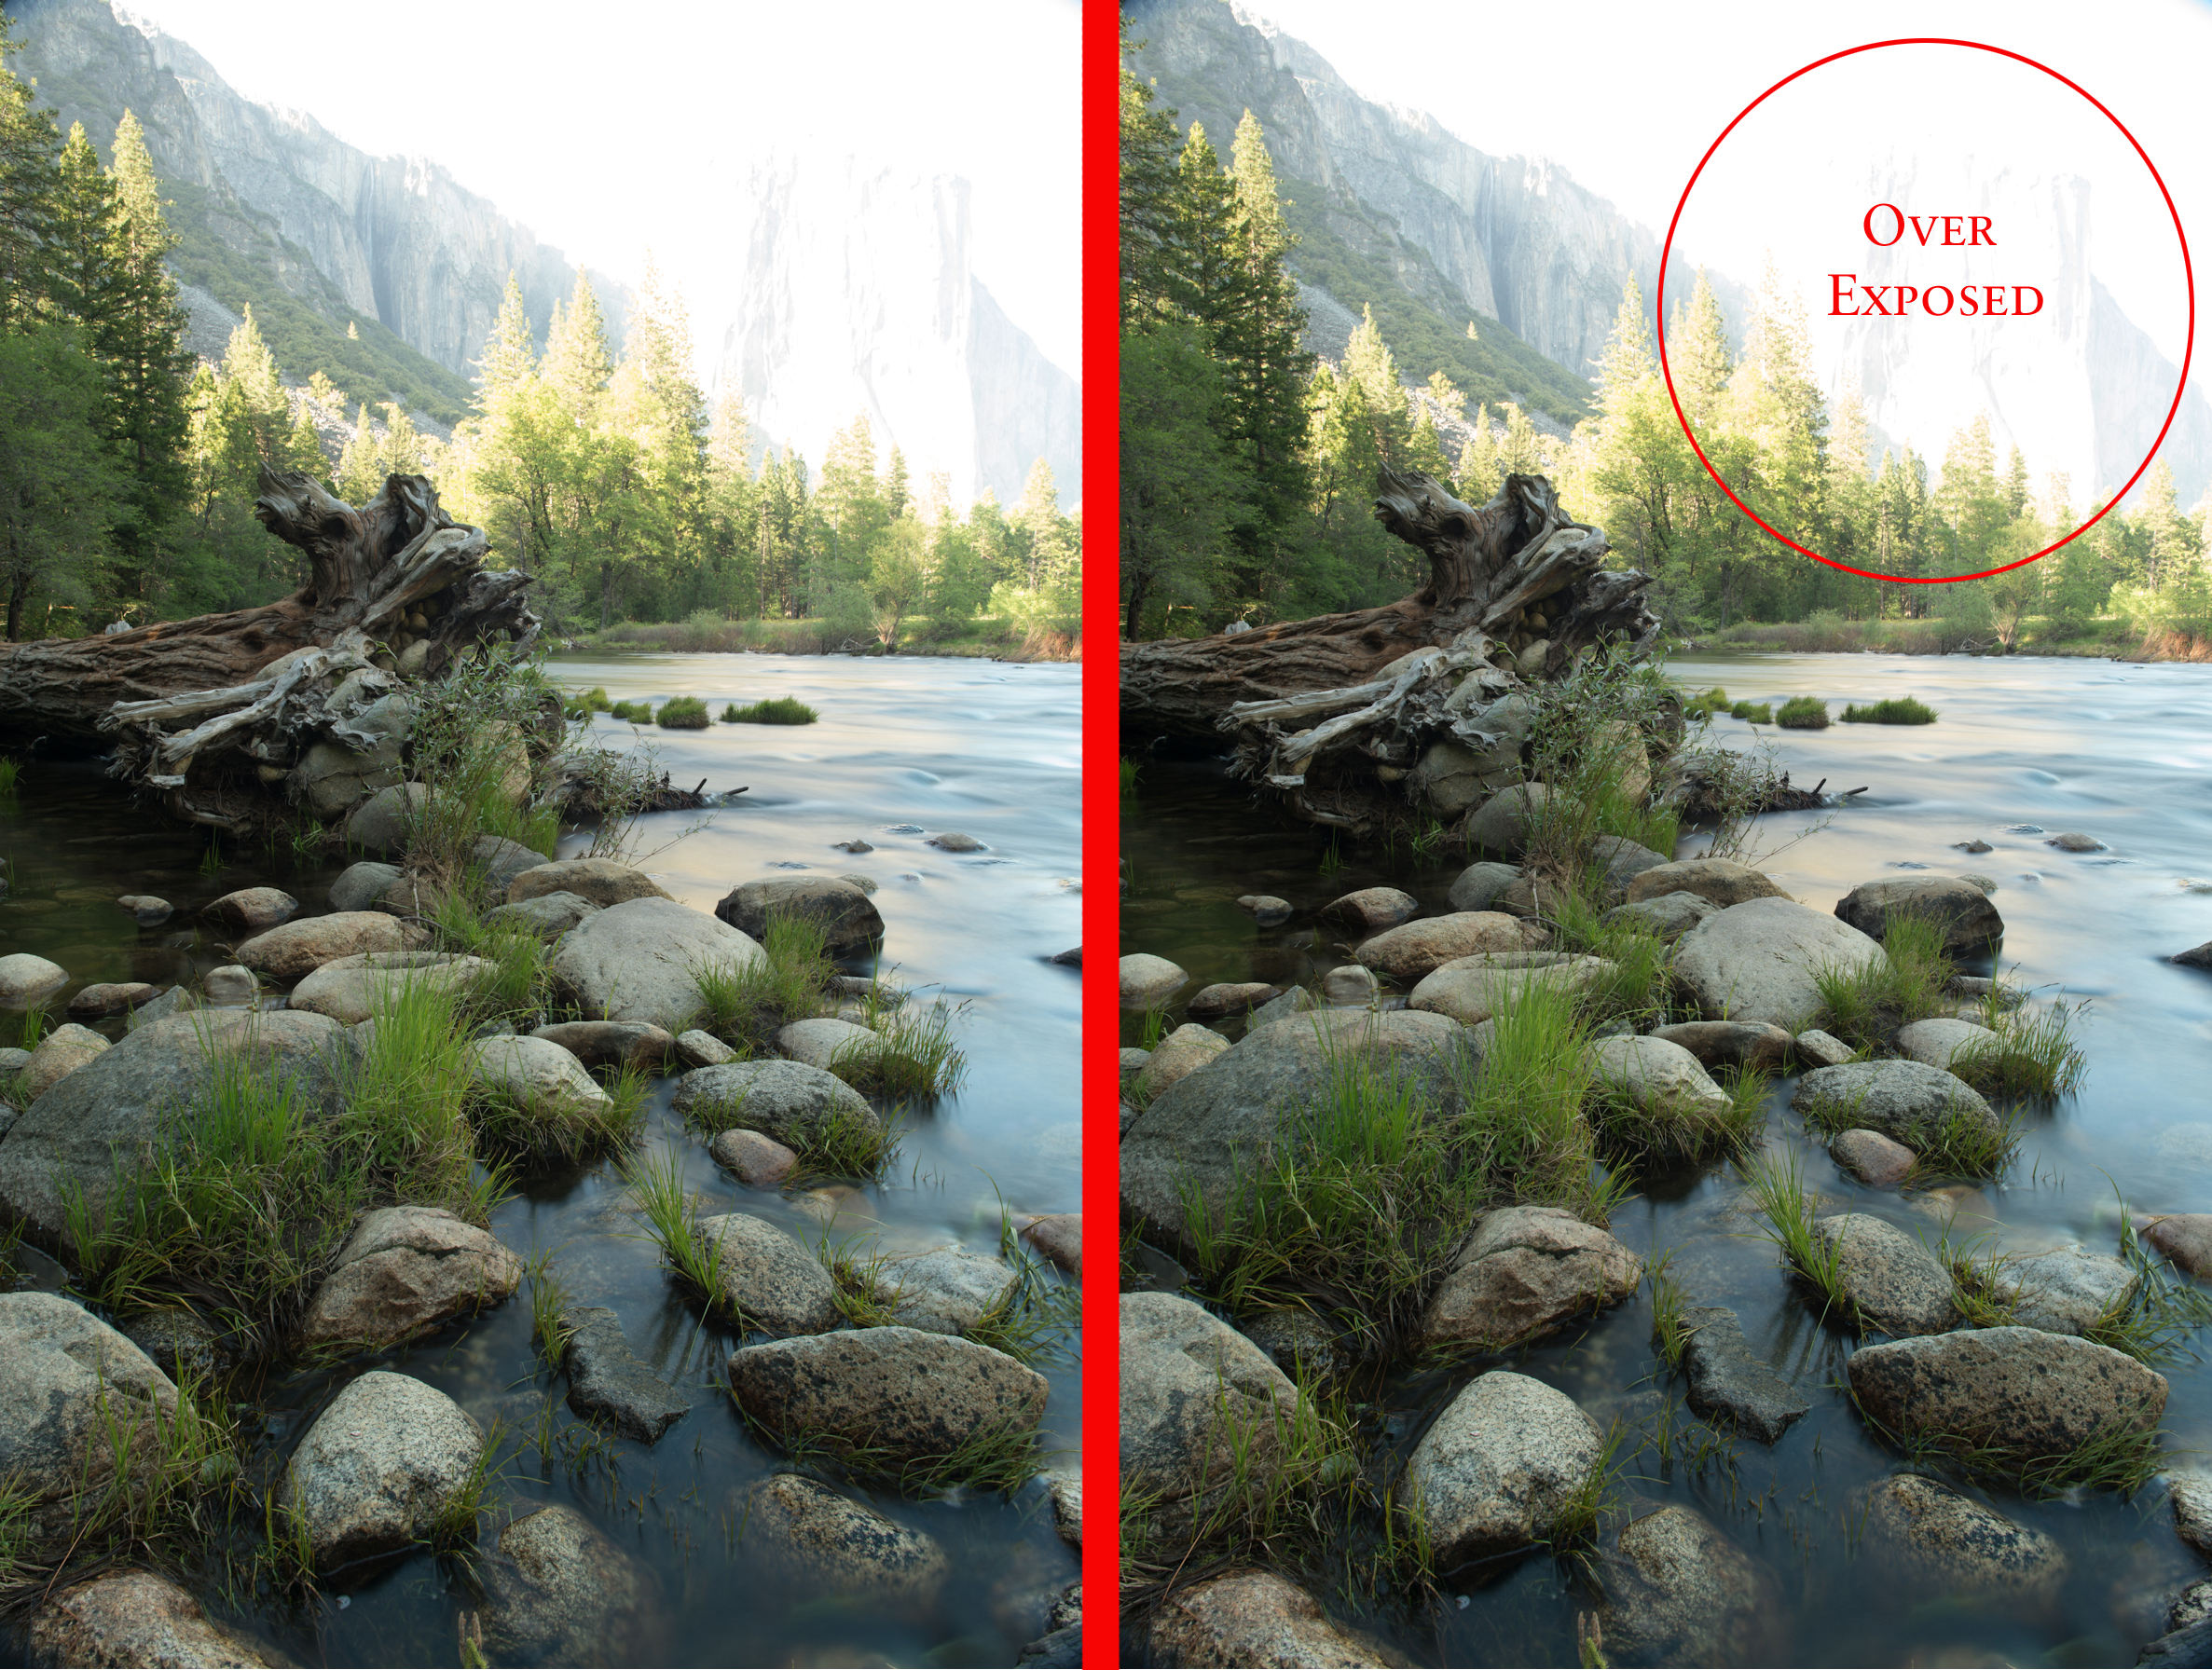
For the composition, I had the rocks and grasses int he foreground lead your eye to the log, which will lead your eye to El Capitan. On the first photograph, the rocks and river were the way that I wanted them, exposure wise  - however, El Capitan was still in bright sunlight and therefore extremely over exposed.

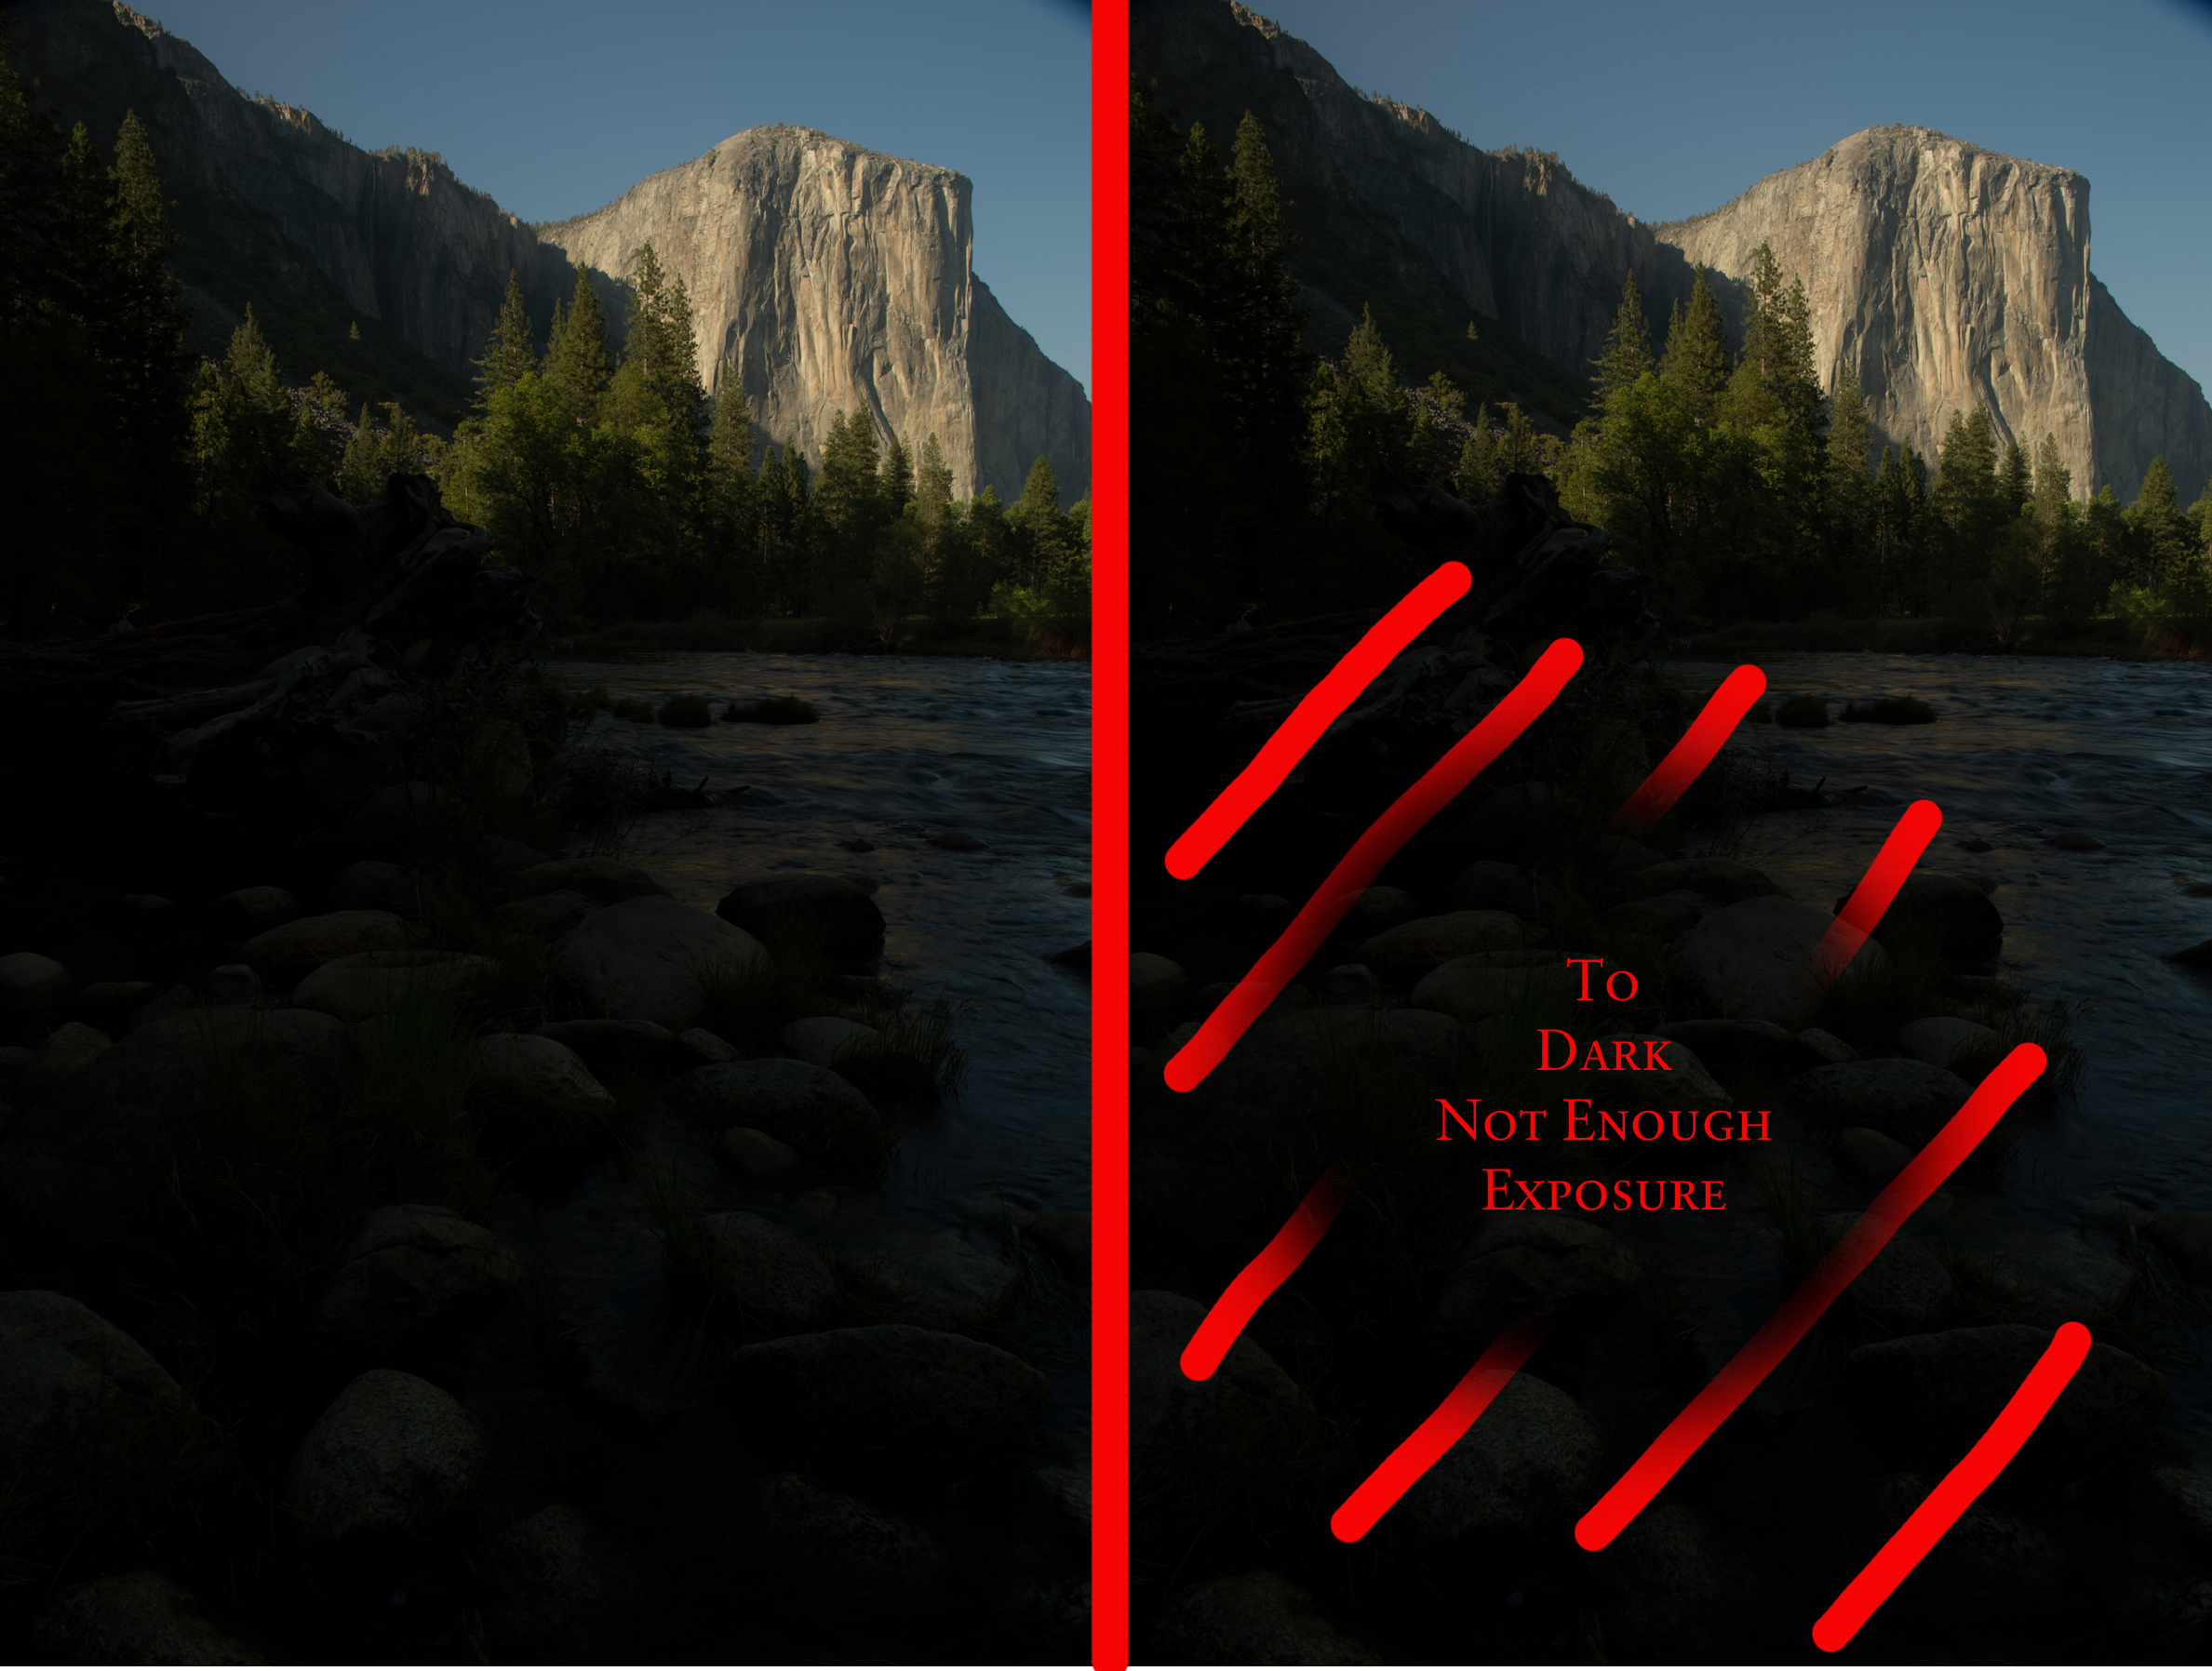
In the second shot, El Capitan was correctly exposed, but the river that was in the shade way way to dark to show any detail.

So I shot both photographs from the same position with everything locked down on a tripod, knowing I was going to get these two images into Photoshop and make the final image there.

********************************

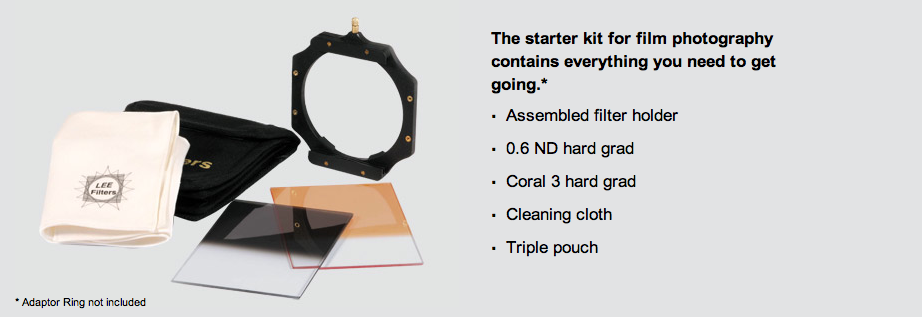
If you don't want to, or can't bring the images into Photoshop, there is a possible solution for you.  Use a graded filter with a filter holder.  These are made by Lee and can be used to darken down a selected area of your image.


While these filter sets are fun to have, they don't give you the precision that Photoshop will give you and if you are already using a Neutral Density filter to get the water to be blurred, another filter and holder system will most certainly create vignetting on the edges of your image if you use a wide angle lens.

**********************************

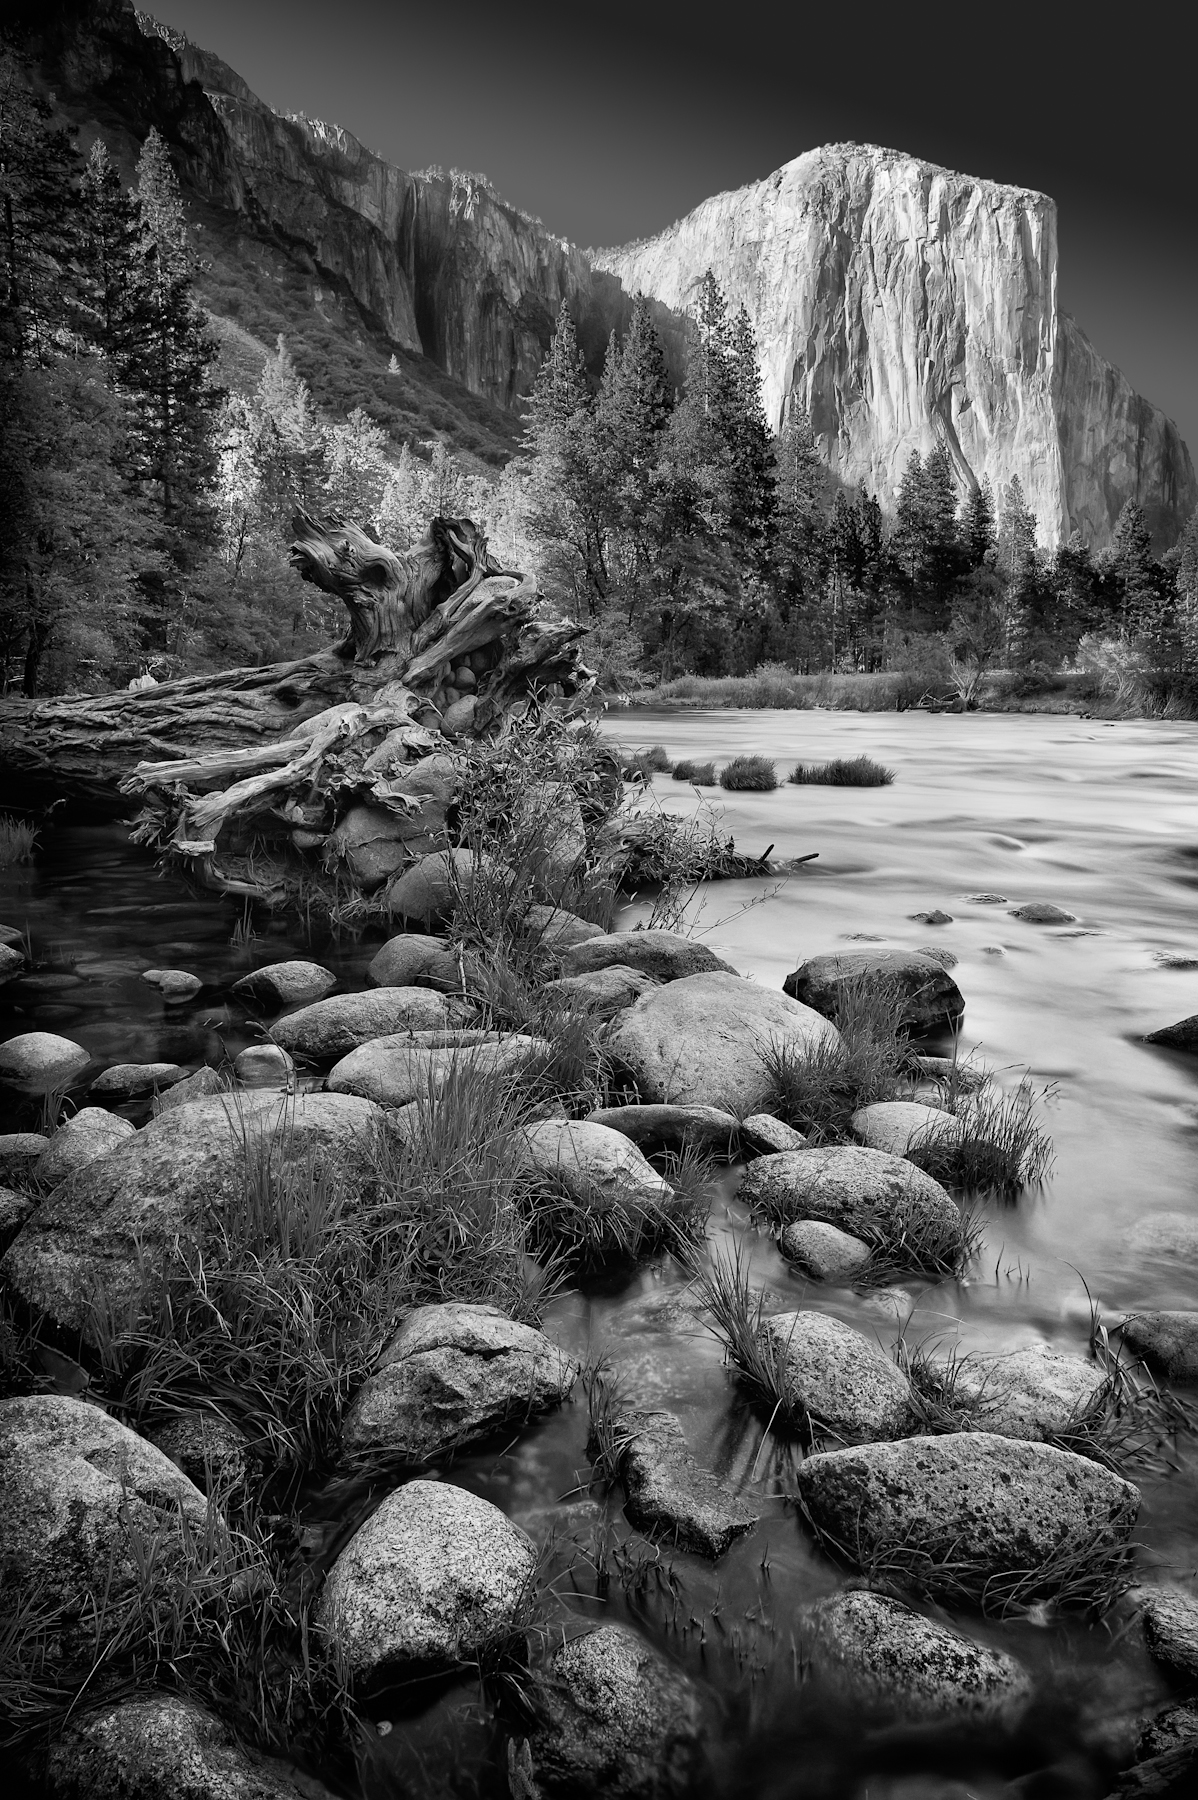
Here is how the image looked after I merged the two best parts of the two images in Photoshop.  I liked it but, didn't love it.  Next was to bring it into Nik Software's Silver EFex Pro 2 software and convert it to black and white.

Copyright 2015, Terry VanderHeiden